Video Part 1
Video Part 2
The Data Science Development Environment
When learning and doing data science, the development environment becomes the platform that you have to process and analyze data. The term comes from applications development in which development changes are typically moved from a development machine through to a testing environment and eventually to the production application. While traditionally most statistics classes involve analysis using a single local machine and maybe a single program, increasingly analytics apps are deployed in such a way that the data is actively used and processing of the data employs a wide variety of packages and programs. For example, a dashboard can be deployed in a production environment-providing such things as forecasts or pricing changes that are directly acted upon in a transactional system. In these types of contexts, there is good reason to try to make the development environment as close to the production environment as possible and to employ techniques. Similar systems across development and production help reduce the possibility that something you work on locally will not work in production.
When learning analytics, a similar development environment can ensure that associated examples and exercises will work across a population of users-who may be using a wide variety of different types of operating systems. Whenever you develop modules your code will often rely upon packages that have been written by others. These packages can provide tremendous functionality while abstracting out complexities to do things like downloading of data from the Twitter Stream API or conducting a neural network analysis. Such packages necessarily may need to be directly compatible with the operating system.
This ended up being a significant issue for me the first analytics class I taught a few years ago. I was trying to provide the students with experience interacting with a number of databases in R. Extracting data from databases is not that complex when you use some of the available packages that handle the connection to the database. However, I found that while the exercises has worked just fine on my Mac, it didn’t work well on anyone who had a windows machine because the versions available for each operating system were different. You similarly don’t want those types of issues if implementation some type of analytics based production environment.
For that reason, we will be incorporating a number of foundational technology tools likely to be important for the data scientist working in the wild as part of the education process. They include Git/GitHub, virtual machines, and the Linux command line.
Git/Github
Git and GitHub provide a Version Control System (VCS) and collaboration platform by which you can control versions of analyses (which are essentially programs) as well as the underlying platform for doing analyses. Git is a program that is installed on your computer that can clone a publicly available repository of code and transfer that information to your machine. Github is the most popular system for sharing and managing code. They also have an easy to use graphical user interface (GUI) for Git called GitHub called Github Desktop that makes managing repositories easy.
Let’s say you have an analysis pipeline that pulls sales data from your CRM and uses it in a forecasting dashboard for your production department. That process needs consistency, such that changes to the code used to make the prediction are tracked and controlled. If you make and update to the algorithm or the way the data is incorporated into the analysis on your local machine you can commit it to the repository to make sure that others also have access to the change. By committing to the repository and synching your changes with Github, everyone working around this project can download this change, and that there is a clear way to go back if anything goes wrong.
Git/Github also gives you the capability to share and test a change without committing it your production environment. Let’s say you would like to experiment with a new prediction algorithm, share and test the changes but not move them into production. Git makes this easy through the concept of branching. The master branch is typically the main production copy of your code. Creating a new branch keeps your changes separate from the production branch. You can commit your changes to the new branch and then others could download them and test them. If everything looked good and worked appropriately, you can merge the branch into the production branch.
Note. When using Git, start with GitHub Desktop but you should also learn your way around the command line. You will likely find it useful if you have to make changes directly on a Linux server.
We will get some active work in using Git as part of this lab.
Virtual Machines
Over the past few years there has been an emergence of some wonderful tools for configuring your local development environment for analytics, whether you are a Mac, PC, or Linux user. The solution involves utilizing a local virtual machine as an alternative to installing and running programs on your local operating system. This enables everyone to use the same development environment or operating system. We will spend less time troubleshooting issues and more time doing data science.
But what is a virtual machine? A virtual machine is a secondary operating system run on top of your primary operating system. You are likely running either OS X (Mac) or Windows as your primary operating system. This is the host machine. It is most common to utilize a virtual machine based upon one of the Linux distributions for your development environment. The Linux machine is a guest of your host. While it is entirely possible to have a Linux machine be a guest in another Linux machine, if you are using a Linux desktop as your primary computer you probably don’t need me to explain this to you. This Linux distribution is the core foundation on which we will build our analytics applications, installing any necessary dependencies and ensuring that whatever your host operating system you have a consistent environment.
For your work in this class we recommend you use our virtual machine based on the Ubuntu Linux operating system. This will simplify your setup time for exercises. How will we share changes involving the virtual machine? Well, using Github and Git of course. However, there are a few more tools you should be familiar with that we will be using as part of our project.
If we setup a virtual machine and shared it with the class, that could be a great way to get everyone on the same development environment. This is the approach that SAS has taken in their virtual machine environment called SAS University Edition.
For our Python and R work, we will be using a custom virtual machine. We could do the same thing and distribute a virtual machine. However, every time we wanted to make an adjustment to the virtual machine we would have to re-download the entire machine (~5 GB). Not cool! Instead we will be using some nifty tools to be able to configure a virtual machine from a “base box” that you will have to download only once.
Vagrant and Chef
Vagrant allows you to “Create and configure lightweight, reproducible, and portable development environments.” We want a development environment for analytics that is preconfigured to do data science, with lots of tools and capabilities build in.
Vagrant does half of the magic, configuring the download of a base box, sharing of files from the host machine (your computer) to the guest machine, mapping of ports and ssh connections so that you can access the guest machine from your host machine. If you want to take a look and see some of what is under the hood, you can open up the vagrantfile see what is there.
Chef does the rest of the magic, configuring specific modules that we want to have installed. A collaborative community around Chef has developed so that you can find recipes for nearly any type of program you would like to install on your development environment in the Chef supermarket.
Whether it is the first time using your vagrant machine or not you can launch it from the command line by simply typing vagrant up. This will download (if necessary) and launch the machine so that you can access it. When you are done using it, just type vagrant halt into the command line and it will shutdown the machine.
Note. We have found that some PC computers will come with support for virtualization turned off. This is a bios setting that must be turned on. Adjustment of bios is specific to the type of computer, so google “YOUR MODEL bios setting” and then look for a setting that involves turning virtualization on. Usually it involves some combination of keys while you start up the machine to enter the mode of operation where you can change the bios.
If you really screw up your virtual machine (no judgment, it happens) and you want to rebuild it from the base image, just type vagrant destroy and it will delete the appropriate files.
We probably won’t be able to get the “perfect” development environment for analytics, and there may be times when you will have to install things on your own. You should know how to do a few things on your guest machine, and so let’s go over the linux command line now.
The Linux Command Line
When using a Linux Virtual machine, we won’t have the same pretty and convenient GUI that we have on our Windows or Mac device. It does exist, as we have selected the lighter-weight server version that will run faster. You can install and run everything on a Linux Desktop machine, but this creates a lot of additional overhead on your local machine, and it doesn’t easily transition to a production environment. We will have to get used to the process of utilizing a Linux command line to do what we need to do.
The command line will allow you to install and run programs, copy and manipulate files, change system settings, etc. Most of the time we won’t do our analytics using the command line, but it is nice to know in a pinch!
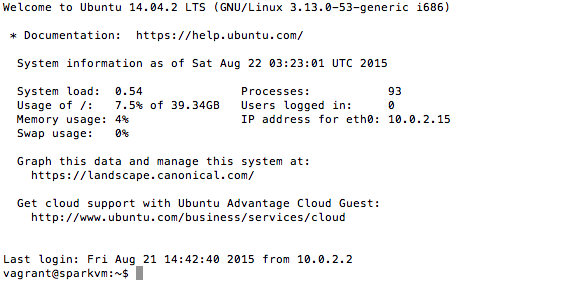
In order to enter the command line or shell of a Linux machine you will need to be in the directory of your vagrant virtual machine. To connect to the guest machine type: vagrant ssh. It should look something like this.
When you first ssh into your guest machine. You will be in your home directory, which is the directory that linux has partitioned for your works. In the case of vagrant configured machines, the user is actually called vagrant and the directory is \home\vagrant. Wherever you are in the directory structure, you can always type cd and you will return home. To see where you are at any time, just type pwd.
Files on your host machine in the repository directory will be mapped to the /vagrant directory on the guest machine. Change to the vagrant directory with cd /vagrant and then use the command ls to show all of the files.
There are lots of text editors available, but I’m partial to nano. If you type nano filename you will edit a file or create it if it doesn’t exist.
To learn more about the Linux command line, check out this tutorial.
Lab 1: Build the Virtual Machine for Python and R
Questions and issues for this lab should be posted to the Piazza site in the Lab 1 folder.
In order to run the virtual machine locally, we will have to do a bit of setup.
- Github. If you don’t yet have a Github ID, go ahead and create one now.
- Github Desktop Github Desktop is the GUI tool to allow you to use git easily.
- Virtualbox. Virtual box is the general purpose virtualizer that is able to start and maintain a virtual instance of the machine.
- Vagrant Vagrant provides flexibility in enabling us to download a base linux distribution and then customize it to our needs.
- Git In order to ssh into the virtual machine Windows users need to install git. This is optional for mac users.
Once you have each of these installed, go to the course repository on Github and fork it by pressing the  button. Forking allows you to experiment with the project without impacting the original project.
Next, launch the GitHub desktop app on your local machine. Log in using your GitHub account. Click on File -> Clone Repository and type in MGMT6963-2015 to clone the class repository to your local machine. (It should be the only one that comes up.)
Assignment - Issue a Pull Request with your Student Information and Photo
It may be that at times there could be an error or enhancement necessary for this class repository. I’d love your help by fixing these. These fixes are uploaded via a pull request. Let’s develop an understanding of how to do this process by providing a short description of yourself as well as a picture to the core repository.
You can start by creating a new branch called yourname_firstfix. You do this by pressing the  button and entering the new branch name.
The description should be uploaded to the /people/RPI/2015 directory. You will find in here a basic template I’ve used called 0_template.yaml. Yaml is a human readable way of storing and encoding data that is increasingly used by websites and other programs.
(1) Copy the 0_template.yaml and change it to last_first.yaml where last and first refer to your names.
(2) Fill in the associated information in last_first.yaml. For example, this is what jasonkuruzovich.yaml looks like:
course: "MGMT6963"
year: "2015"
semester: "Fall"

# Role should either be Instructor or Student or TA
role: "Instructor"
name: "Jason Kuruzovich"
email: "kuruzj@rpi.edu"
description: "Professor, hacker, and supporter of all things entrepreneurship."
hobbies: "Running, sailing, biking, cooking."
picture: "/img/jasonkuruzovich.jpg"
github_username:  "jkuruzovich"
twitter_username: "jasonkuruzovich"
linkedin_username: "jasonkuruzovich"
website: "www.jasonkuruzovich.com"

#Additional student info
desiredJob: "What type of job are you looking for when you graduate"
program: "What program you are in"
(3) Add a profile picture to the photos directory. Be sure to name the file as specified in the .yaml file.
(4) Commit the changes to your new branch using GitHub desktop. You will have to add a summary of your change.
(6) Issue a pull request to the RPI-Analytics/master branch. Again, you will have to add a description.
That is it! I can now merge your pull request in to the main repository.
Why am I doing this? Well, websites are really just a bit of structured data and I’d love to have it so that this data with the right html can turn the data in this page to a class webpage build on Middleman, which uses YAML as one tool to generate static web pages.
Building the VM
While that process of forking, creating a new branch, and then creating a pull request is required for 2-way collaborations, it creates some additional complexity as in order to update all recent changes that I’d rather not burden you with going forward. As a result, let’s start over and just put a read only copy of the class repository on our computer.
To do this, go to the course GitHub repository and press the  button. This will create a copy of the RPI-Analytics/MGMT6963-2015 repository on your desktop. You should now have two versions on Github Desktop (the forked version and the original /RPIAnalytics version.
Once you have successfully cloned the repository you are ready to build your virtual machine. Note. You probably with have to do this outside of class or via a cabled internet connection.
To build the virtual machine, it is really quite easy. Just open up a command line prompt (Windows) or terminal. From within the GitHub Desktop you can right click on the repository and Open in Terminal. This will automatically take you into the directory that holds your Vagrantfile.
If you are unfamiliar with this, here is a great overview for windows and Mac
To build the virtual machine, you have to have the vagrant omnibus plugin installed. Follow the commands below:
>vagrant plugin install vagrant-omnibus
>vagrant up
The resulting configuration can take around 20 minutes depending on the size of your processes, but what is happening is really brilliant. It starts by downloading a “base box” that can be used again should you ever need to rebuild the virtual machine. It then uses Chef to install the wide variety of different components necessary for doing analytics.
Now if everything goes well, Vagrant & Chef will finish configuring your virtual machine and you are ready to get started!
You should test that both the R Studio Server and the Python development environment are working properly.
R Studio (The username and password for RStudio is vagrant)
OK! So you now have the virtual machine for the class and have some understanding of the use of Git to manage changes.
To be able to execute the SAS examples, go ahead and download the SAS University Edition. We won’t be doing much actively in the assignments, but it is useful to start getting an understand of similar ways of completing tasks.